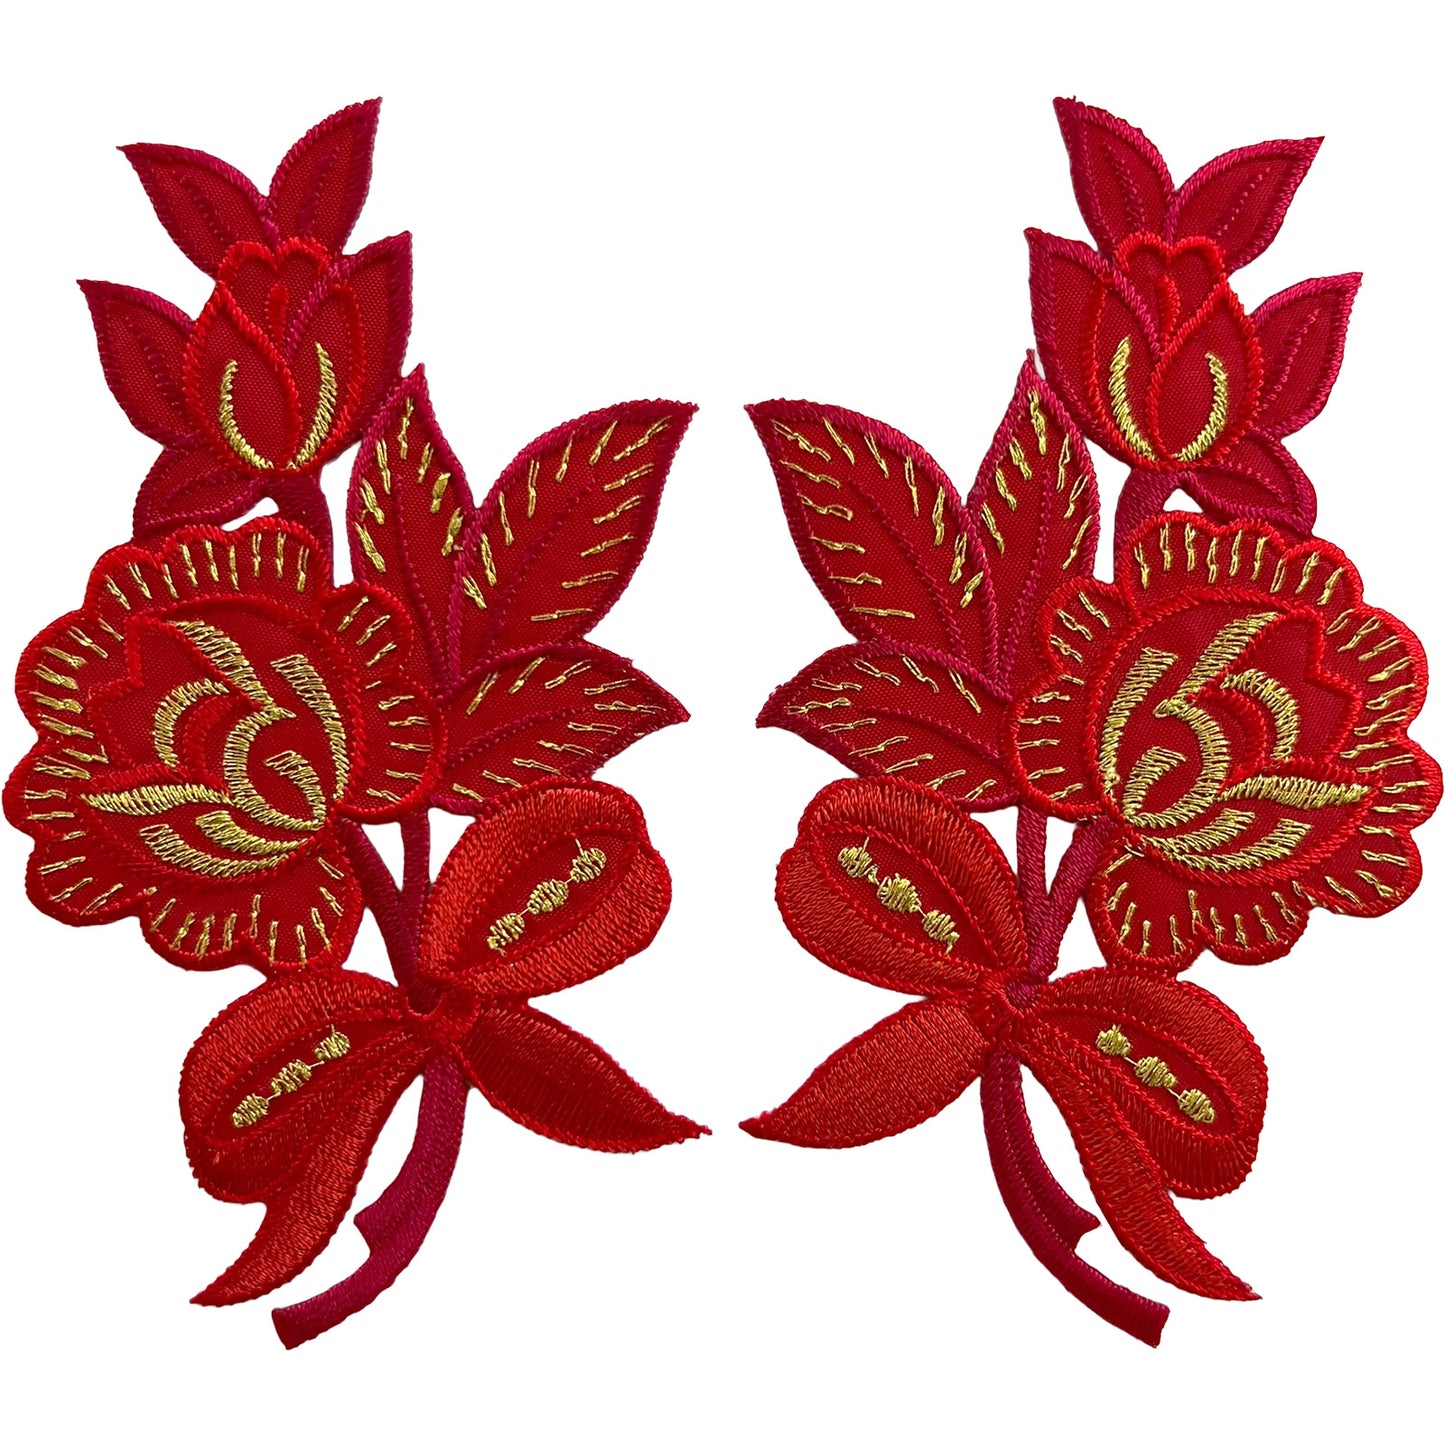
Pair of Red Flower Patches Iron On Sew On Denim Jeans Crafts Flowers Patch Badge
Pair of Red Flower Patches Iron On Sew On Denim Jeans Crafts Flowers Patch Badge
Product Type: Iron On Patch, Sew On Patch
Tagged: Flower, Red Flower, Red, Symmetrical
Low stock
Buy 3 or more patches and get 35% OFF
Couldn't load pickup availability
Share
Pair of Red Flower Patches Iron On Sew On Denim Jeans Crafts Flowers Patch Badge
Add a rich splash of colour and beautifully detailed floral embroidery to your clothing, denim and craft projects with this striking pair of red embroidered flower patches. Designed with large open flowers, smaller flower buds, layered leaves and flowing stems, these decorative appliqués are ideal for transforming everyday garments and accessories into something more distinctive.
The design combines vibrant red and deeper crimson tones with contrasting gold-toned embroidered details. Fine golden stitches accent the petals and leaves, highlighting the shapes within the floral arrangement and creating an attractive contrast against the rich red background.
Supplied as a coordinating mirrored pair, one patch faces left while the other faces right. This makes them particularly useful when you want to create a balanced or symmetrical design on a jacket, pair of jeans, dress, skirt or other garment. Alternatively, separate the pair and use each patch on a different item.
Each individual patch measures approximately 6.9 cm Width x 11.8 cm Height.
Striking Red Floral Embroidery
The combination of rich reds and golden detailing gives these patches a bold decorative appearance. The larger flower forms the centrepiece of each design, accompanied by a smaller bud and a collection of pointed leaves.
Carefully placed gold-toned stitching follows the curves of the flowers and adds fine vein-like details to the foliage. Different shades of red help define the individual sections of the design, while the embroidered edging provides a neat outline.
They are an easy way to introduce the appearance of detailed floral embroidery without having to embroider the garment yourself.
Perfect for Denim, Clothes and Creative Crafts
These versatile patches can be used for all sorts of clothing customisation and textile projects.
Try them on:
- Denim jeans and trousers
- Denim jackets and waistcoats
- Shirts and blouses
- T-shirts and tops
- Dresses and skirts
- Shorts
- Coats and jackets
- Fabric handbags
- Tote bags
- Backpacks
- Fabric accessories
- Handmade clothing
- Sewing projects
- Textile crafts
- Upcycling projects
They can also be used as a creative decorative repair. If a favourite pair of jeans, jacket or other suitable garment has a small mark, stain, worn section or minor hole, positioning an embroidered patch over the area can disguise it while adding a completely new feature to the garment.
Creative Ways to Use Your Red Flower Patches
Because you receive two complementary patches, there are many different ways to arrange them.
Give an old pair of jeans a makeover
Red embroidery can look particularly striking against blue or black denim. Position one patch on each leg for a balanced design, or place the flowers alongside the front pockets.
They can also be used around the back pockets or towards the lower legs. For a more individual look, try placing one patch higher on one leg and the second lower down on the opposite side.
Create a statement denim jacket
Place one patch on each side of the front of a denim jacket. Their vertical shape makes them ideal for decorating areas alongside the lapels, pockets or front opening.
For a bolder design, position both patches on the back of the jacket facing towards each other. Together they create the appearance of a larger floral arrangement.
Decorate a dress or skirt
Position the flowers around the hem of a skirt or dress, beside pockets or towards the waist. The mirrored pair makes it easy to create a symmetrical decorative feature.
Personalise a shirt or top
Add a single patch to one side of a shirt for an asymmetric look, or position the pair on opposite sides for a more balanced design.
Transform a plain fabric bag
Use the flowers to decorate a suitable tote bag, backpack or fabric handbag. Place them side by side, facing one another, or use one patch on each side of the bag.
Create coordinating clothes and accessories
Instead of using both patches on one garment, use one on a denim jacket and the second on a bag or pair of jeans. This is a simple way to create coordinating pieces.
Get creative with upcycling
Combine these red flowers with other embroidered patches, decorative trims or your own stitching. They can become part of a much larger design on jackets, jeans, bags and other textile projects.
How to Iron On the Red Flower Patches
The patches feature an iron-on backing, making them convenient to attach to many suitable fabrics.
Before starting, check the garment's care label. The material must be able to withstand the heat needed to activate the adhesive. If the fabric is delicate, waterproof, coated, stretchy or heat-sensitive, it is better to sew the patch on instead.
Step 1 – Prepare your garment
Make sure the fabric is clean and completely dry.
Place the garment on a firm, flat and heat-resistant surface. Smooth the material so there are no creases underneath the area where the patch will be attached.
Briefly iron the application area before positioning the patch. This helps remove wrinkles and moisture from the fabric.
Step 2 – Position the patch
Place the patch in your chosen position with the embroidered red design facing upwards and the adhesive backing against the fabric.
If you are using both patches together, arrange them carefully before applying any heat.
For a symmetrical design, you may find it helpful to measure from a pocket, seam, zip, waistband or other fixed point to make sure both patches are positioned evenly.
Step 3 – Cover the embroidery
Place a thin cotton cloth or suitable pressing cloth over the entire patch.
This protective layer prevents the hot iron from making direct contact with the embroidered threads.
Avoid placing the iron directly onto the exposed embroidery.
Step 4 – Apply heat and pressure
Set your iron to an appropriate medium-to-high temperature for the fabric. Make sure the steam function is switched off.
Press the iron firmly over the protected patch for approximately 20–30 seconds.
Use firm, steady downward pressure rather than continually sliding the iron backwards and forwards.
Make sure the whole patch receives sufficient heat. Pay particular attention to the pointed leaves, outer petals and narrow ends of the design so that these areas bond securely.
Step 5 – Heat from the reverse
Where possible, turn the garment inside out.
Apply the iron to the reverse side of the patch area for approximately another 20–30 seconds.
Heating from the back can help activate the adhesive evenly through the fabric and strengthen the bond.
Step 6 – Allow the patch to cool
Leave the garment lying flat and allow the patch to cool completely before handling it.
Do not immediately pull at the edges or bend the patched area. The adhesive continues to set as it cools.
Once cool, gently check the edges. If you find a section that has not fully attached, cover it again with the pressing cloth and apply heat for a little longer.
Avoid washing the item immediately after application to give the adhesive time to settle.
How to Sew On the Flower Patches
These patches can also be sewn onto your chosen garment or craft project.
Sewing is ideal when working with fabrics that cannot safely withstand ironing. It can also provide a particularly secure attachment for items that are frequently worn or washed.
Start by placing the patch exactly where you would like it.
Use sewing pins or a few temporary holding stitches to keep the patch flat and prevent it from moving while you sew.
Choose a strong sewing thread. Red or dark red thread will blend well with the embroidered outer border if you want the attachment stitches to be discreet.
Thread a hand-sewing needle and tie a secure knot at the end.
Begin from the reverse side of the fabric so the knot is hidden.
Bring the needle through the garment close to the embroidered edge of the patch. Make small, neat stitches around the outer border.
Follow the curves of the flower petals and the shape of the leaves carefully. Smaller stitches can make it easier to work neatly around the detailed sections.
Pay particular attention to the pointed leaves, narrow stems and outer tips. Securing these sections well helps reduce the chance of them catching or lifting during everyday wear.
Continue sewing around the entire outline until the patch is securely attached.
Finish on the reverse side of the fabric and tie the thread firmly.
For Extra Security – Iron First, Then Sew
If the fabric is suitable for ironing, you can combine both application methods.
First iron the patch into position and allow it to cool completely. You can then add small stitches around the outer edges.
The iron-on adhesive holds the patch neatly in place while the stitching provides additional security.
This method can be especially useful for denim jeans, jackets, backpacks and frequently used fabric accessories.
When Is Sewing the Better Choice?
Although the iron-on backing is convenient, sewing may be preferable when working with:
- Delicate fabrics
- Heat-sensitive materials
- Stretchy garments
- Waterproof fabrics
- Coated materials
- Heavily textured fabrics
- Frequently washed clothing
- Heavily used bags and accessories
If you are unsure whether your fabric can safely tolerate the required ironing temperature, sewing the patch on is the safer option.
Washing and Caring for Your Patches
A little care can help keep your embroidered patches looking attractive after application.
Where possible, turn the garment inside out before washing. Use a moderate washing temperature and avoid unnecessarily harsh washing cycles.
Allow the item to dry naturally where practical.
After repeated washing or regular wear, check around the edges of the patches. If an ironed edge begins to lift, it can be reheated using a protective pressing cloth or reinforced with a few small stitches.
Product Details
Quantity: Pair of 2 embroidered flower patches
Design: Floral arrangement featuring a large flower, smaller flower bud, leaves and stems
Colour: Red and deep crimson with gold-toned embroidered detailing
Style: Coordinating mirrored left and right facing pair
Size: Each patch measures approximately 6.9 cm Width x 11.8 cm Height
Application: Iron on or sew on
Suitable for: Denim, jeans, jackets, clothes, dresses, skirts, trousers, bags, crafts, sewing and upcycling projects
Whether you want to turn a plain denim jacket into a statement piece, add colourful floral decoration to your jeans, disguise a small worn area or create your own unique craft project, this pair of red embroidered flower patches provides a versatile and attractive way to add rich colour and detailed floral embroidery.