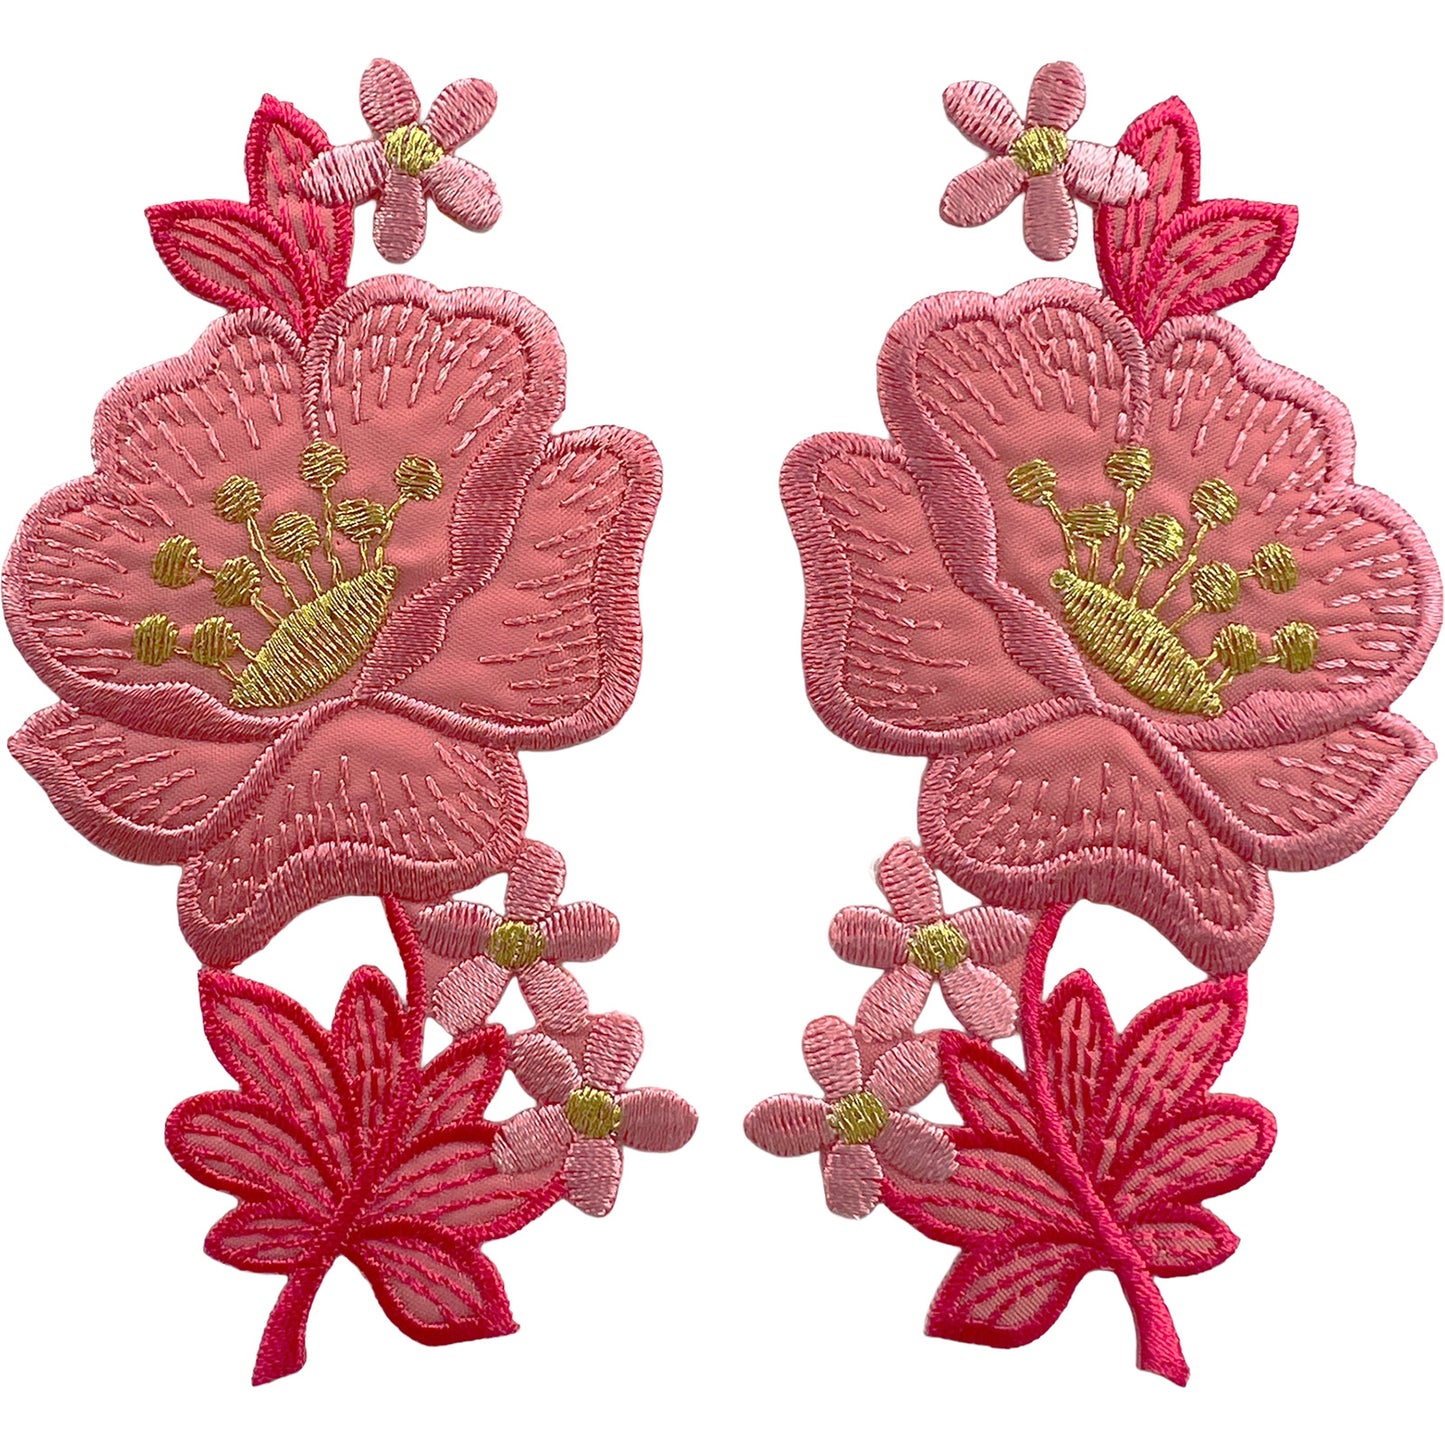
Pair of Pink Gold Flower Patches Iron Sew On Clothing Bag Flowers Patch Badge
Pair of Pink Gold Flower Patches Iron Sew On Clothing Bag Flowers Patch Badge
Product Type: Iron On Patch, Sew On Patch
Tagged: Flower, Pink Flower, Pink, Symmetrical
Low stock
Buy 3 or more patches and get 35% OFF
Couldn't load pickup availability
Share
Pair of Pink & Gold Flower Patches – Iron On & Sew On Clothing Bag Embroidered Floral Patches
Add a beautiful floral feature to clothing, bags and creative projects with this pair of Pink & Gold Flower embroidered patches. Designed with a combination of soft pink flowers, deeper bright pink leaves and elegant gold embroidered centres, these decorative patches have plenty of fine stitched detail that gives the design texture and character.
The patches form a matching pair, with one facing left and the other facing right. This mirrored design makes them particularly attractive when positioned together on opposite sides of a garment or accessory, although each patch can also be used separately on different projects.
Suitable for both iron-on and sew-on application, they offer plenty of possibilities for personalising clothing, updating accessories, repairing favourite garments or creating something completely unique.
Size
Each patch measures 6 cm Width × 11.9 cm Height.
You will receive two matching embroidered flower patches.
Design
The floral design features a large soft pink flower with detailed stitched petals and an eye-catching gold embroidered centre. Smaller pink flowers and deeper pink leaves complete the design, creating a combination of different shades and textures.
Gold embroidery provides a striking contrast against the pink and adds an attractive finishing detail without overpowering the floral design.
Because the two patches are mirrored, they work particularly well as a pair on the front of clothing, either side of a neckline, on opposite shoulders or on matching areas of a bag or other accessory.
How to Iron On
Before applying your patch, check that the fabric is suitable for ironing and can withstand the necessary heat. Cotton, denim and similar heat-resistant fabrics are generally well suited to iron-on application. Delicate, waterproof, coated or heat-sensitive materials should be sewn instead.
Make sure the fabric is clean and completely dry before beginning. Place the item on a firm, flat, heat-resistant surface and smooth out any wrinkles.
Position the patch exactly where you would like it with the adhesive backing facing down against the fabric. Take a little time to check the positioning before applying heat, particularly if you are using both patches together and want them to appear symmetrical.
Place a thin cotton cloth, tea towel or sheet of baking parchment over the patch. This creates a protective barrier between the iron and the embroidered surface.
Set your iron to a medium-high cotton setting of approximately 150–170°C and make sure the steam function is switched off.
Press the iron firmly over the covered patch for approximately 30–45 seconds. Apply steady, even pressure across the whole design rather than continuously sliding the iron backwards and forwards.
If the garment allows, turn it inside out once the initial application has been completed. Place the iron directly over the fabric behind the patch and press for another 20–30 seconds. Heating from the reverse side helps activate the adhesive throughout the patch and encourages a stronger bond.
Allow everything to cool completely before moving or testing the patch. The adhesive continues to set as it cools, so avoid pulling at the edges while it is still warm.
Once cool, gently check around the outside of the patch. If you find an area that has not completely bonded, cover it with the protective cloth again and press with the iron for a further 10–15 seconds. Allow it to cool again before checking.
For garments that are washed frequently, or accessories such as backpacks and bags that receive regular handling, adding a few stitches around the patch after ironing can provide additional security.
How to Sew On
Sewing is a great alternative to ironing and provides a strong, long-lasting attachment. It is particularly useful for delicate fabrics, heat-sensitive materials or items where you would simply prefer the additional security of stitching.
Begin by positioning the patch exactly where you would like it. If you're applying both patches as a matching pair, check their spacing and alignment before you start sewing. Pins or fabric clips can be used to prevent the patch from moving while you work.
Choose a thread that matches the pink embroidered border if you want your stitches to be less noticeable. Thread your needle and tie a secure knot at the end.
Starting from the reverse side of the fabric, bring the needle through close to the embroidered border. Work around the entire outside edge using small, evenly spaced stitches. Keeping the stitches close to the border will help create a neat finish while holding the patch securely against the fabric.
Continue until you have sewn around the complete design. Check that there are no loose areas before tying the thread securely on the reverse side and trimming away the excess.
A sewing machine can also be used if the garment or accessory can be comfortably positioned underneath the presser foot. A straight stitch or narrow zigzag stitch around the embroidered outer edge can provide a neat and durable attachment.
Care Instructions
When using the iron-on method, allow approximately 24 hours before washing so that the adhesive has plenty of time to set.
For best results, wash the garment on a gentle cycle and avoid bleach or harsh cleaning products. Turning clothing inside out before washing can also help protect the embroidery from unnecessary friction.
Air drying is preferable where practical. If the garment needs ironing in the future, avoid placing a hot iron directly onto the embroidered patch. Iron from the reverse side or place a protective cotton cloth over the embroidery first.
Ideas for Using Your Pink & Gold Flower Patches
These patches are a lovely way to personalise a denim jacket, shirt, dress, cardigan, hoodie or pair of jeans. Because the designs face opposite directions, they can be positioned on either side of the front of a jacket or shirt to create a coordinated floral feature.
They can also look great on the shoulders or sleeves of clothing, along the sides of a dress, on trouser legs or positioned around a neckline. You could use both together for a more noticeable design or separate them and use one patch on each of two different items.
For accessories, try adding them to a tote bag, handbag, backpack, fabric purse or other textile accessory. A plain bag can quickly be given a completely different appearance with the addition of embroidered floral detail.
The patches are also useful for upcycling. Instead of throwing away a favourite piece of clothing because of a small stain, worn section or minor hole, an embroidered patch can turn the damaged area into a decorative feature.
They can also be incorporated into sewing and craft projects, handmade gifts, costume designs, fabric decorations and other creative textile projects.
With their combination of soft pink, vibrant pink and contrasting gold embroidery, these matching flower patches provide an easy way to add colour, floral detail and individual character to clothing, bags and accessories.